How do I set up my Hubside mailbox on my iPhone?
For holders of the “Exclusiv” formula, you have the possibility to create two mailboxes.
We will accompany you to integrate them into your messaging on iPhone.
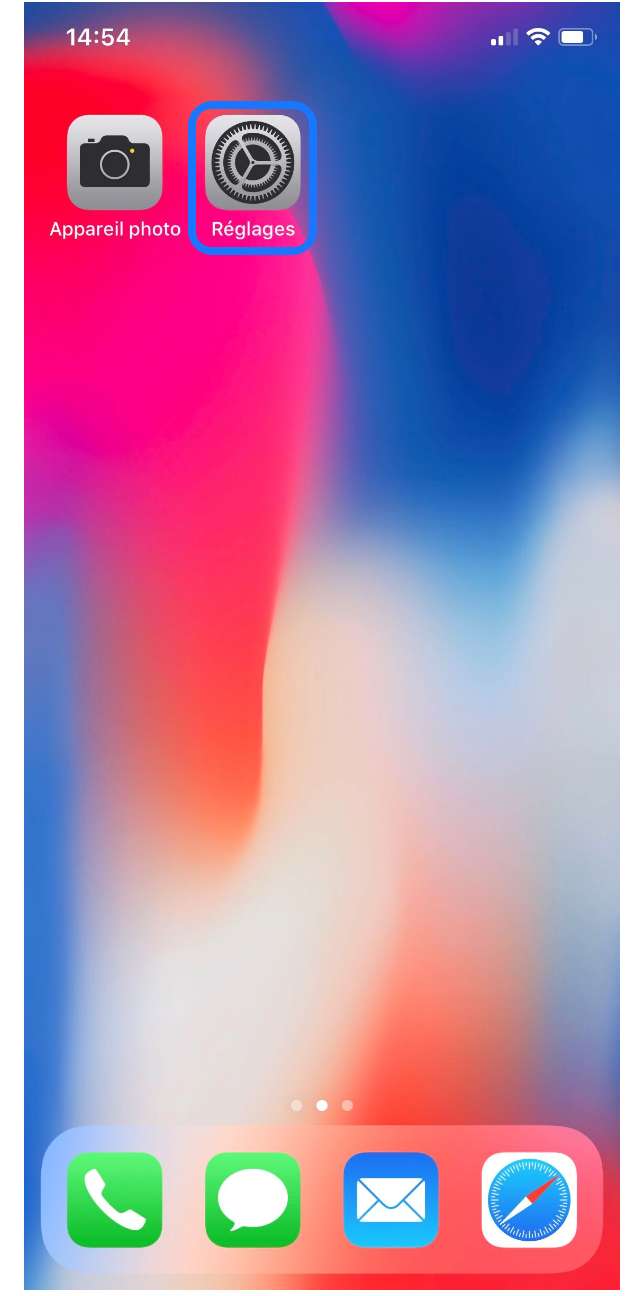
Step 1:
Click the Settings icon
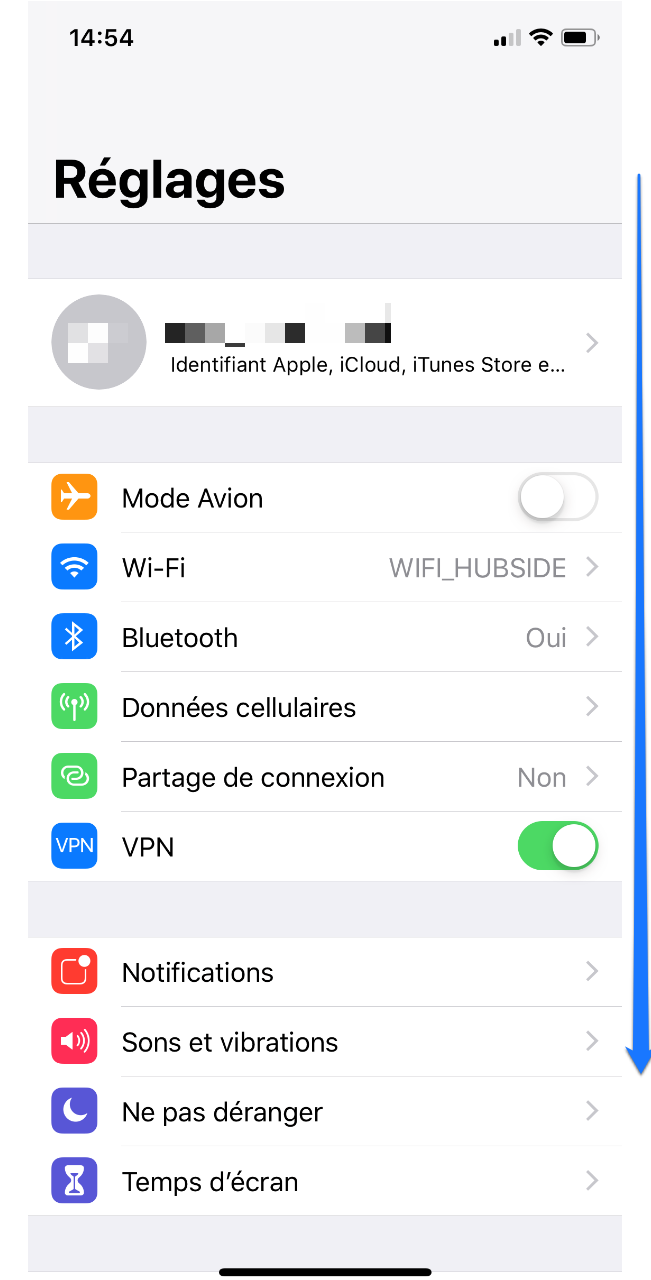
Step 2:
Scroll down
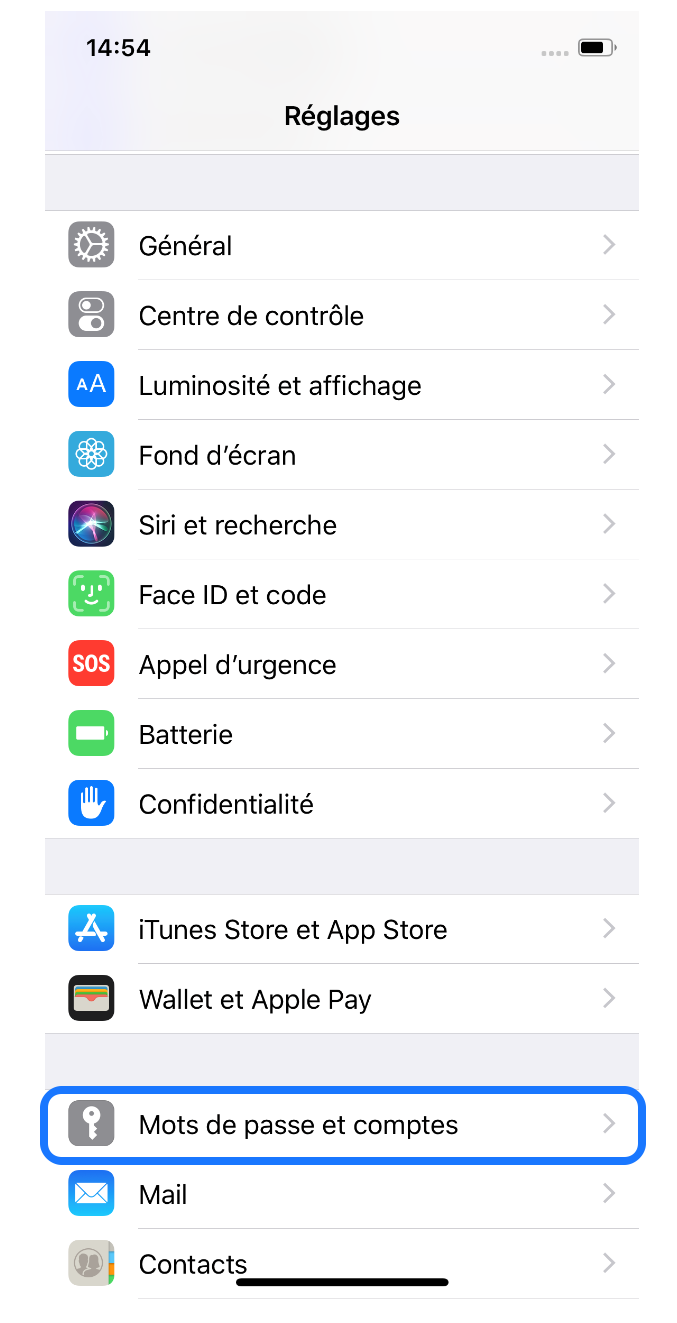
Step 3:
Click on Passwords and accounts
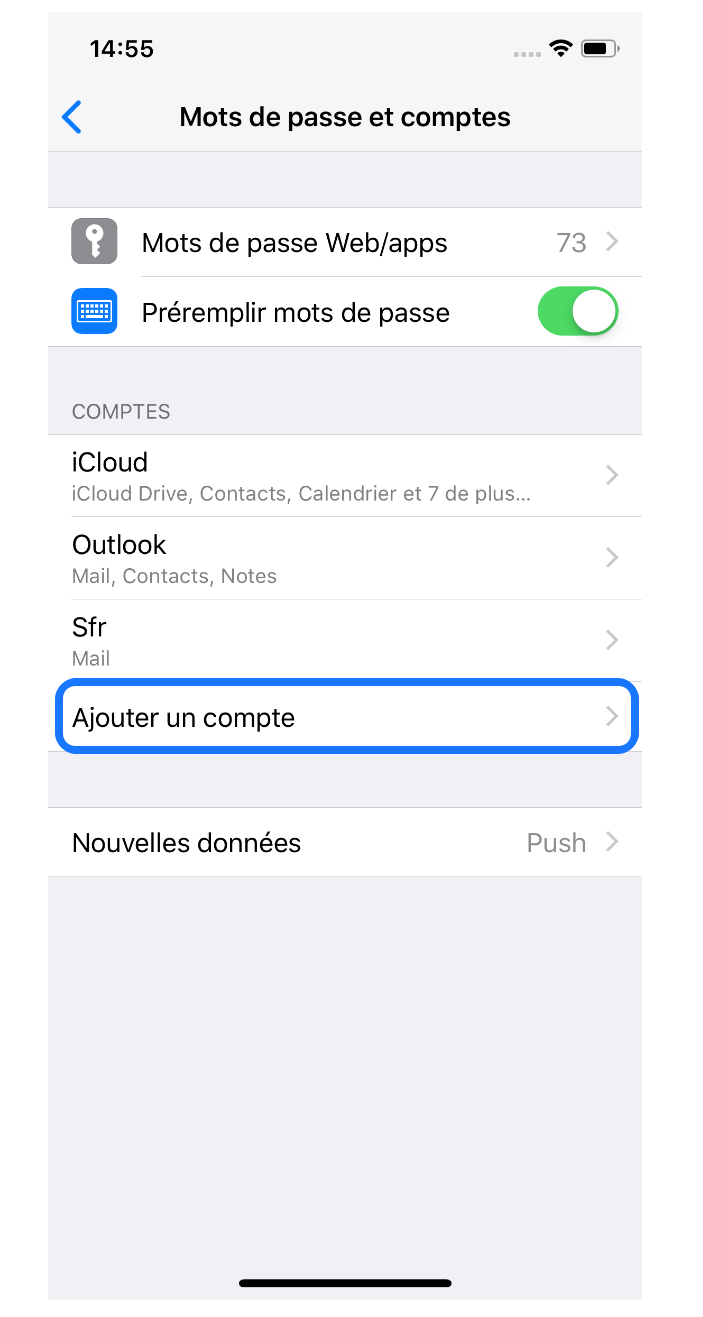
Step 4:
Click on add an account
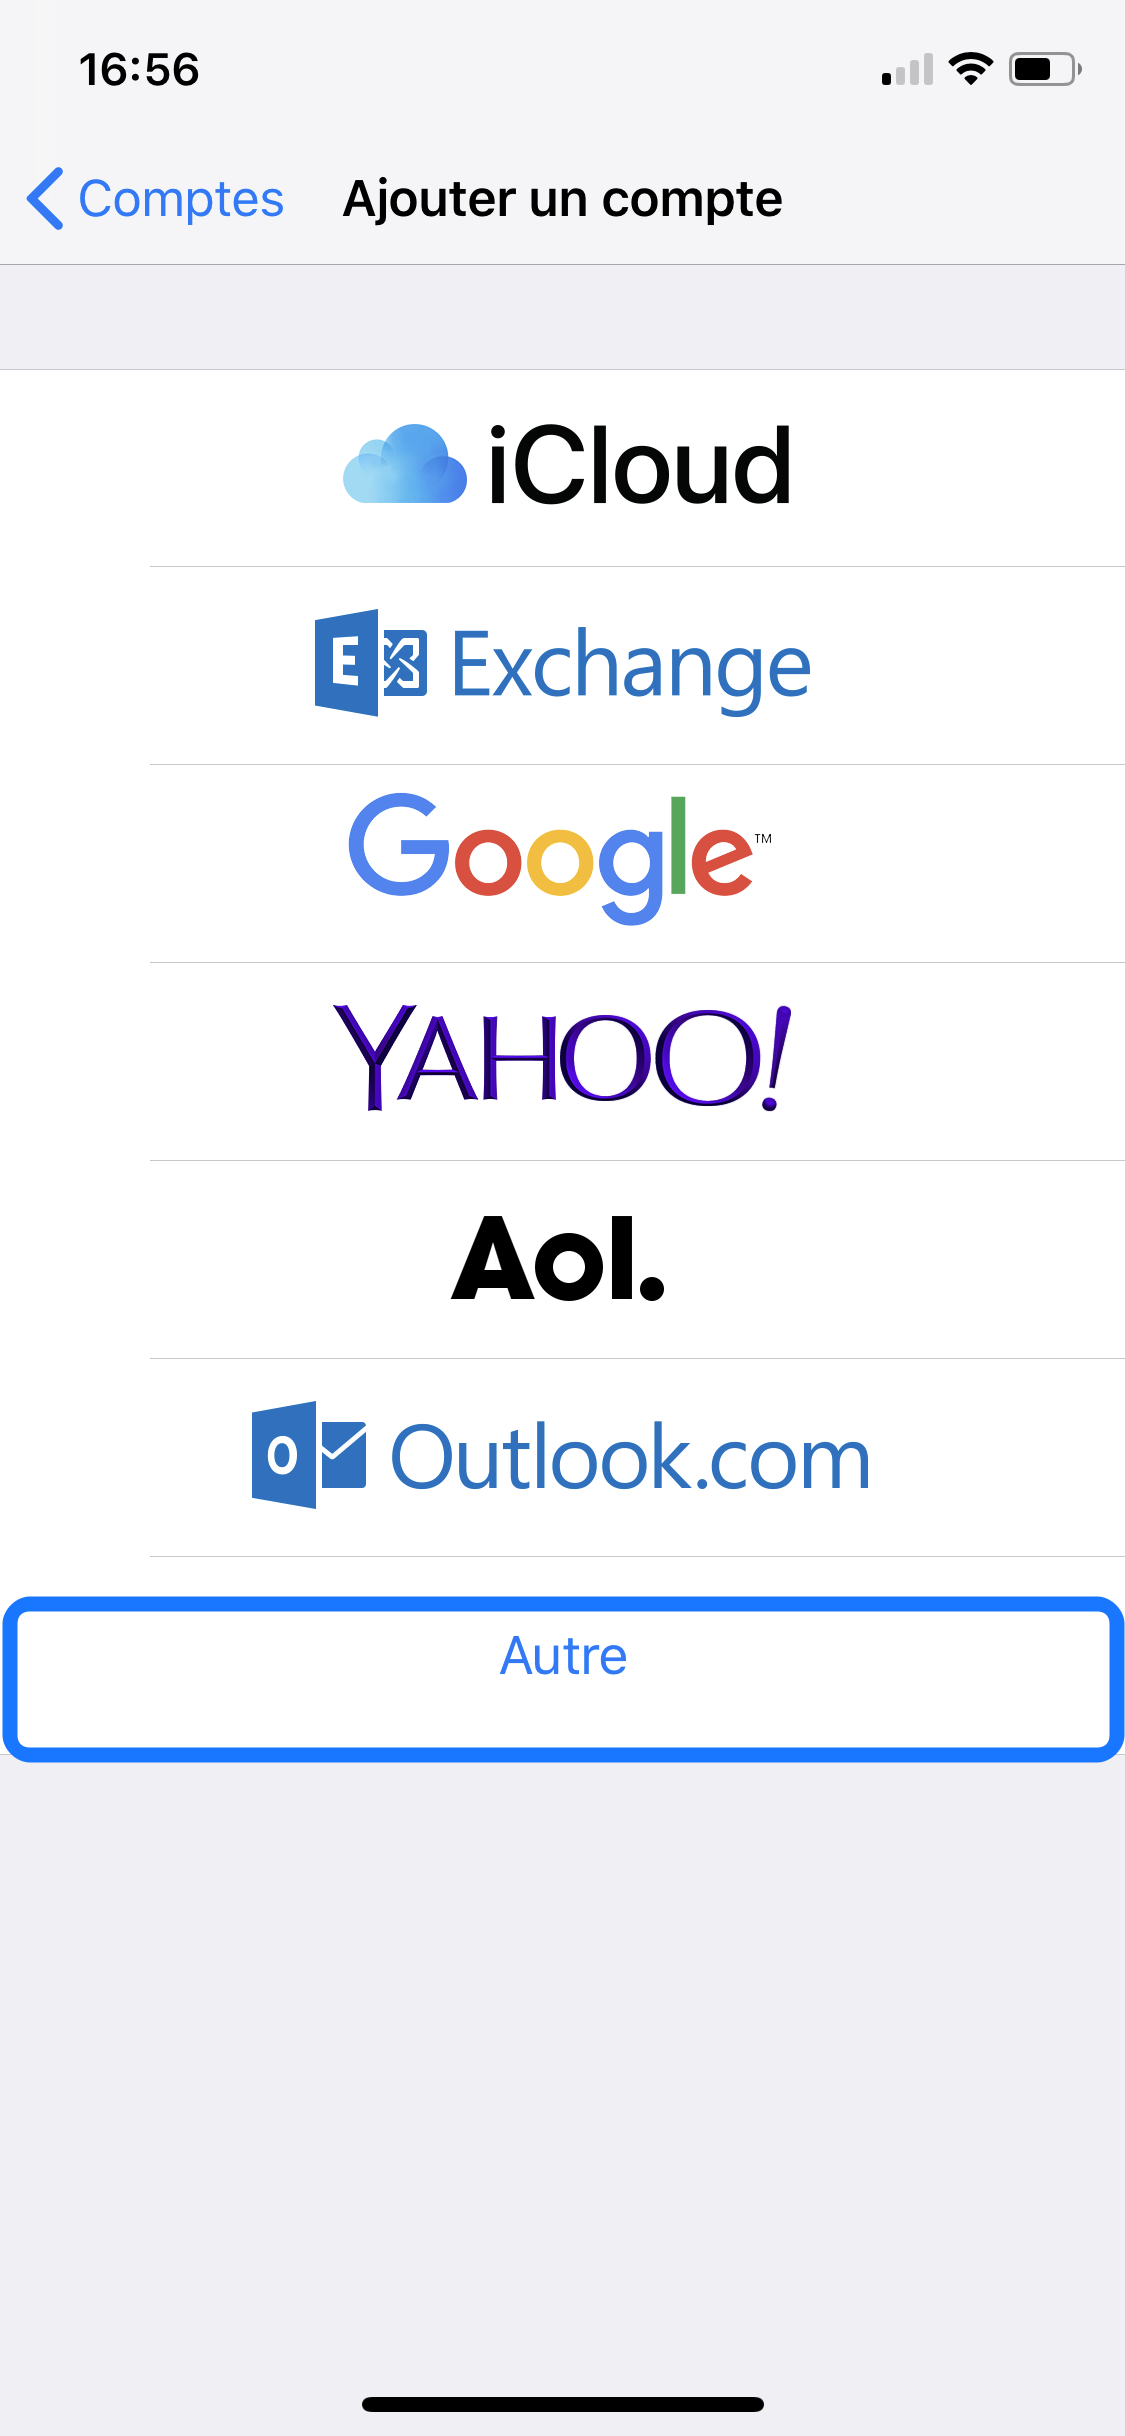
Step 5:
Click on Other
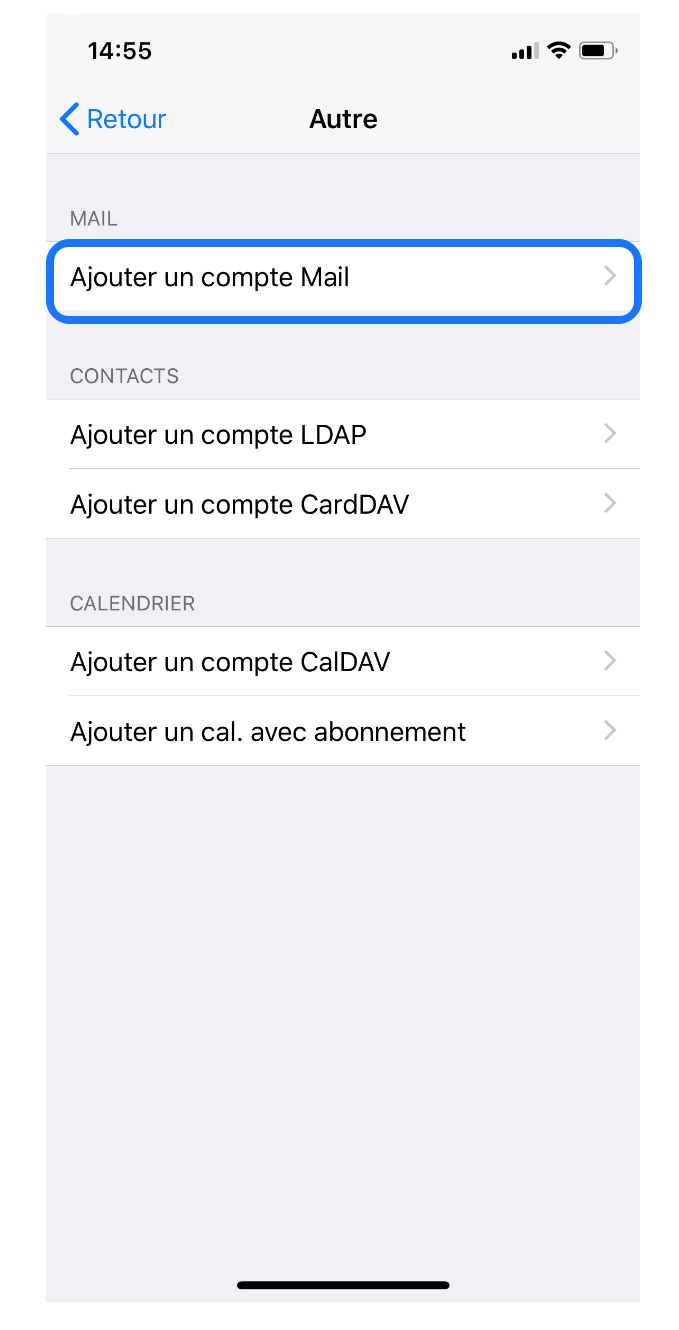
Step 6:
Click on Add an email account
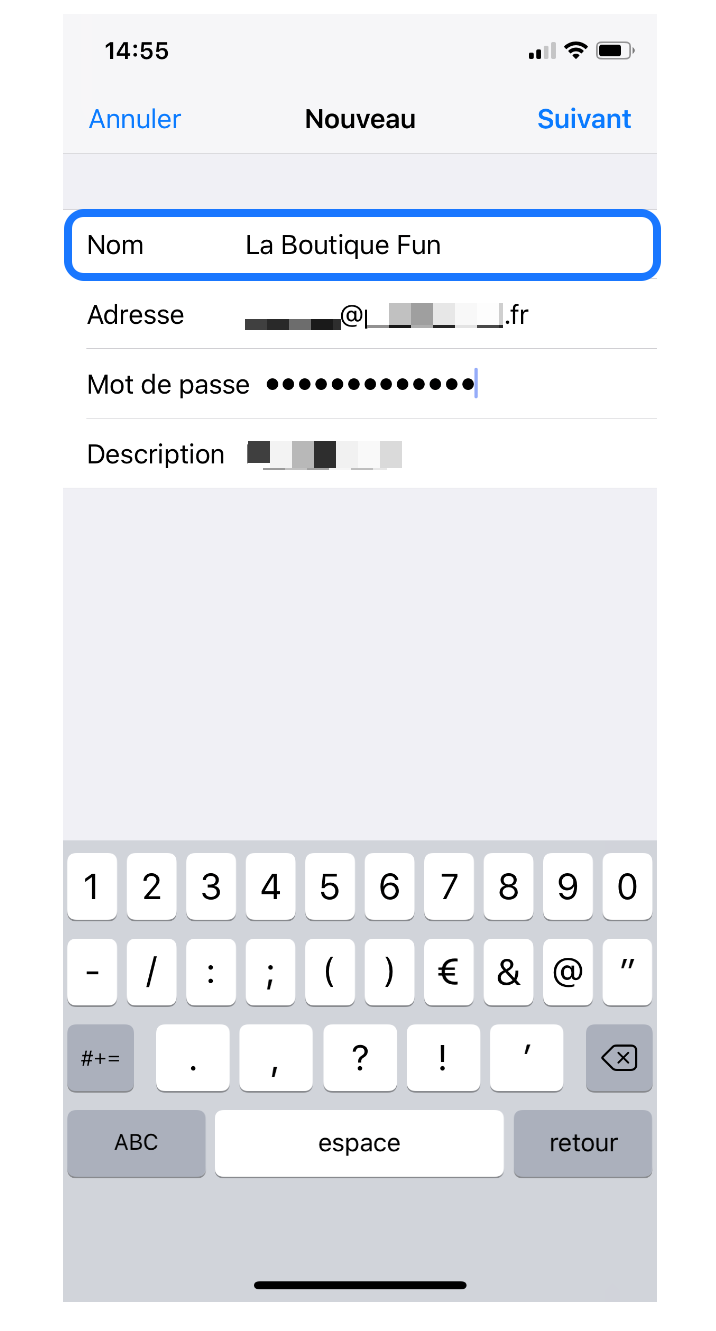
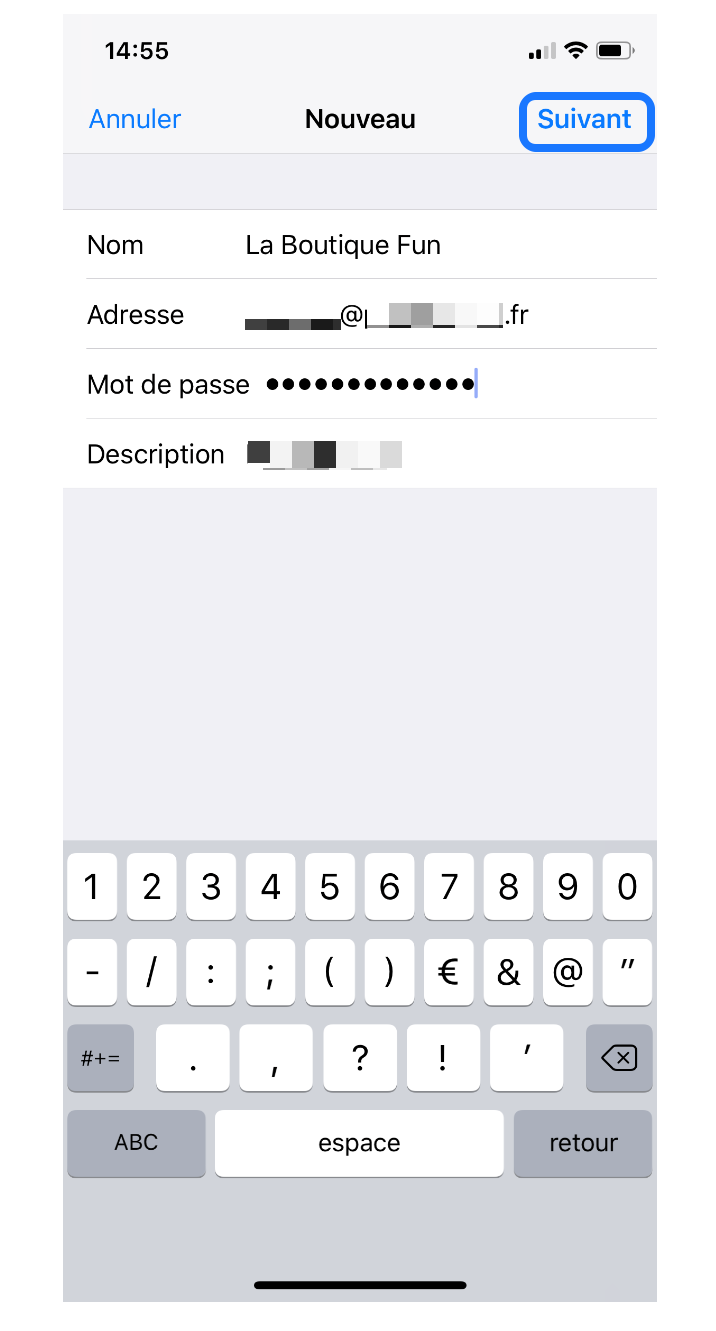
Step 7:
Choose the name that will appear on your mailbox
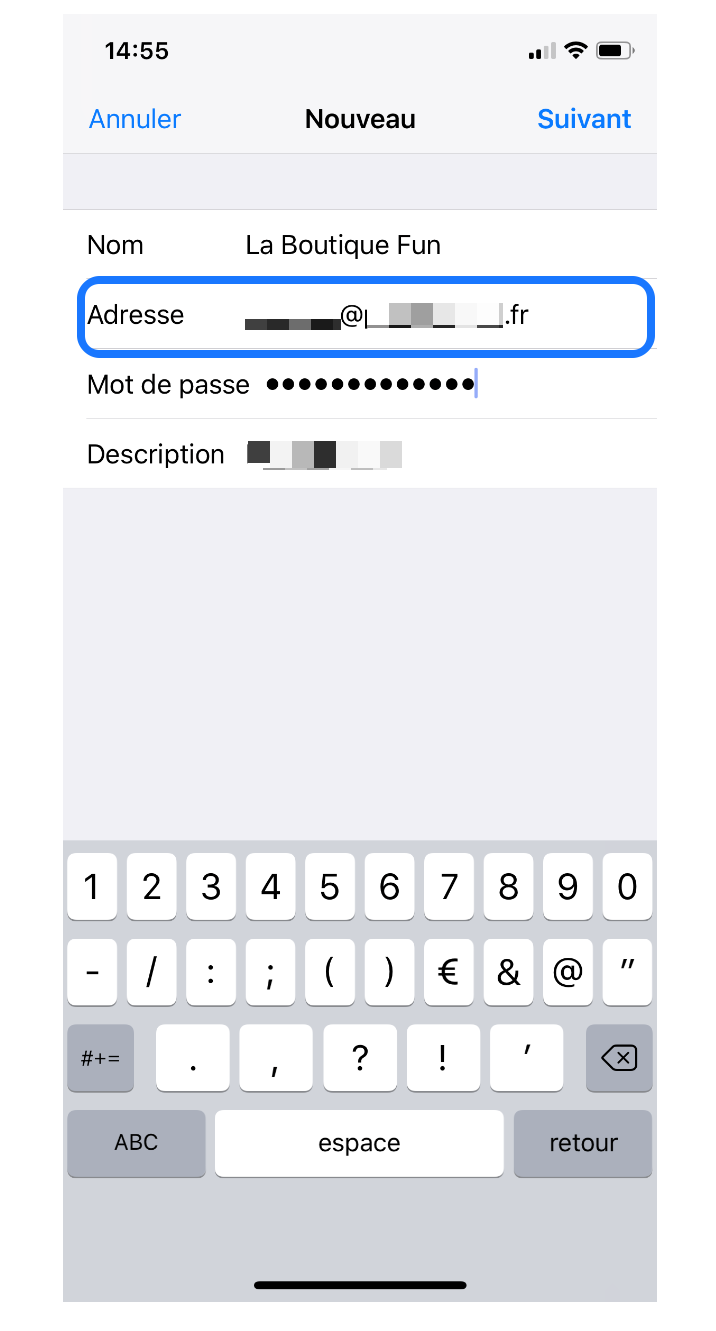
Step 8:
Type your email address
Step 9:
Type your password

Step 10:
Click Next
Step 11:
Type in the host name: mail.gandi.net
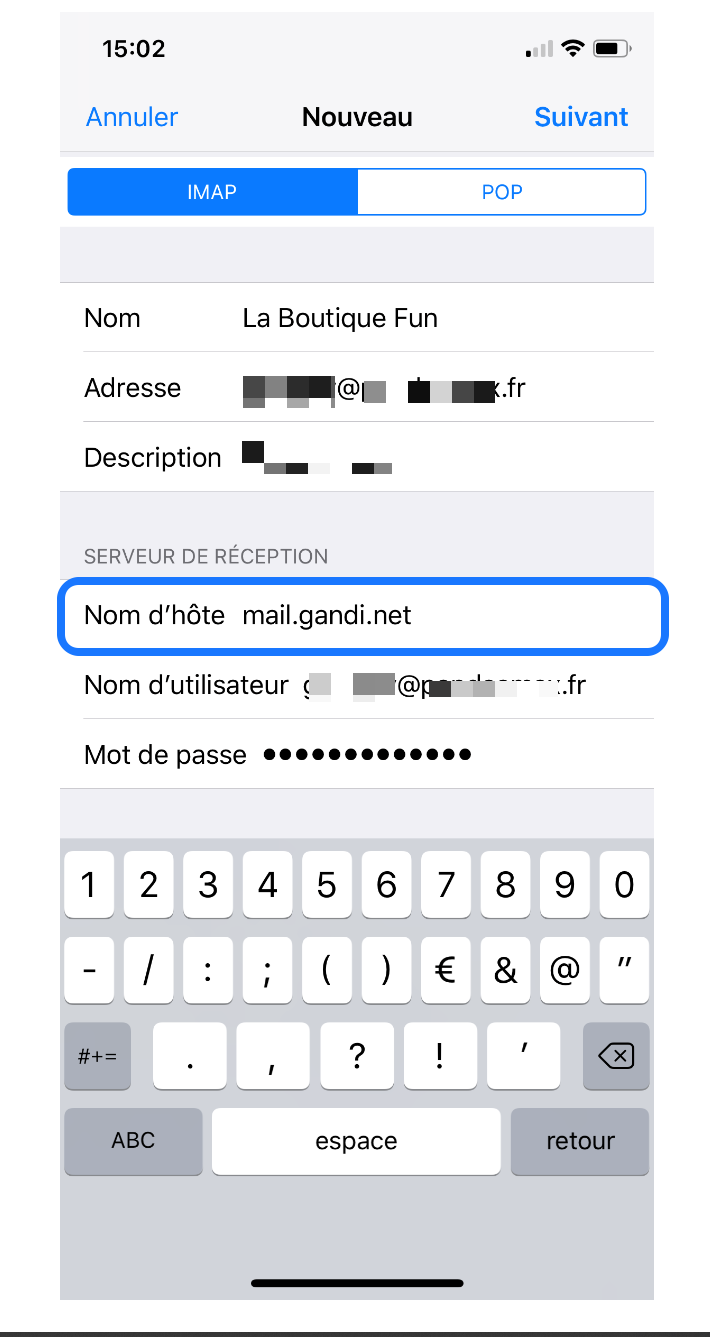
Step 12:
Type in Username your email address
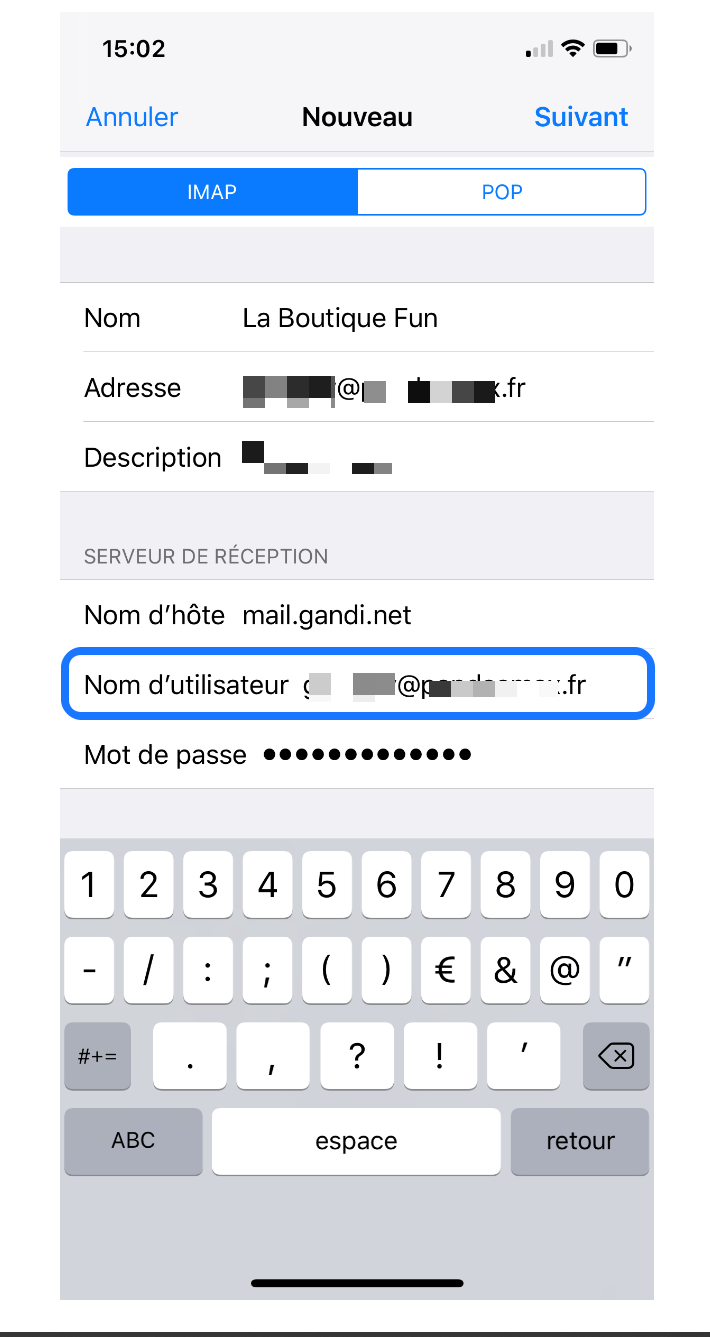
Step 13:
Scroll down
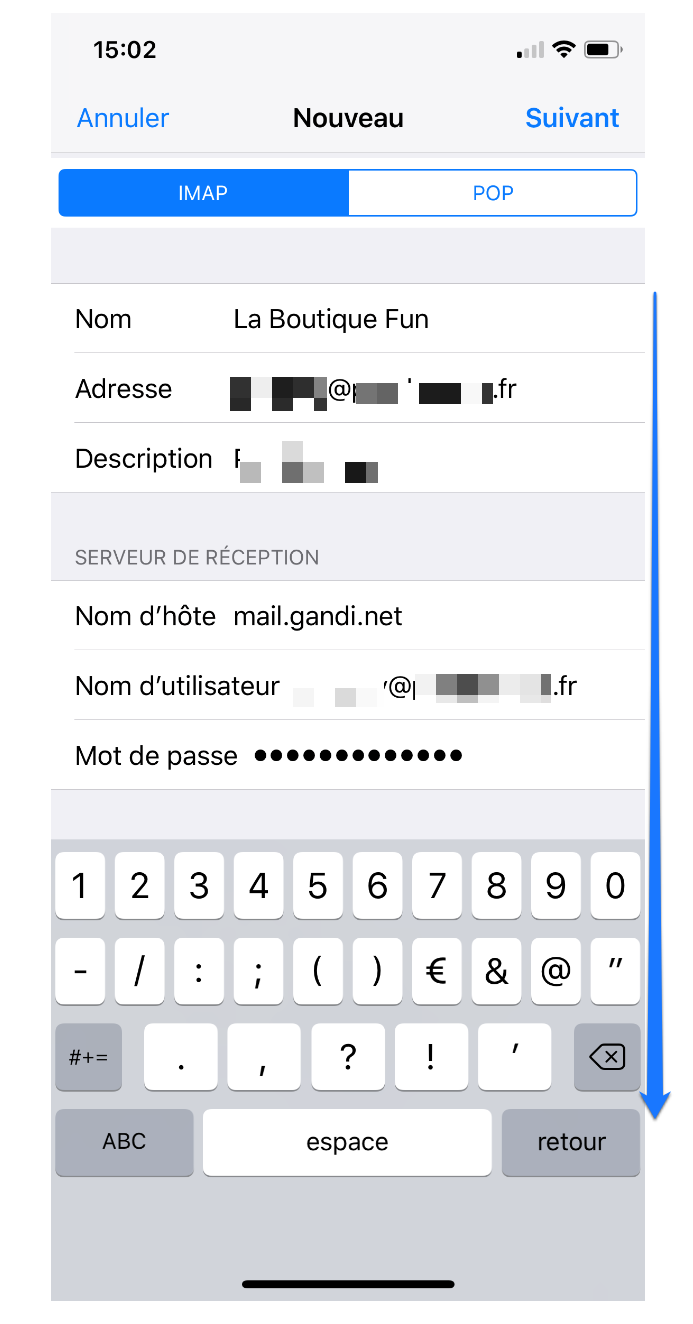
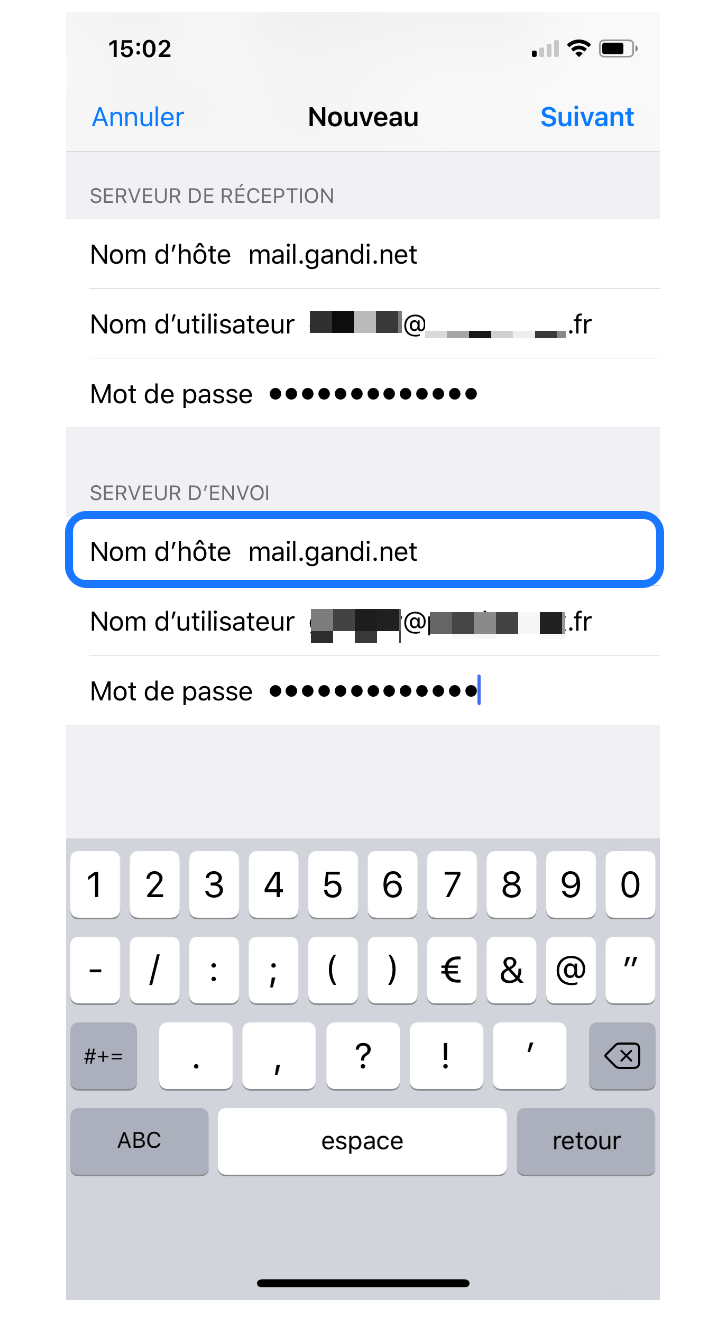
Step 14:
Type in Host name: mail.gandi.net
Step 15:
Type in Username your email address

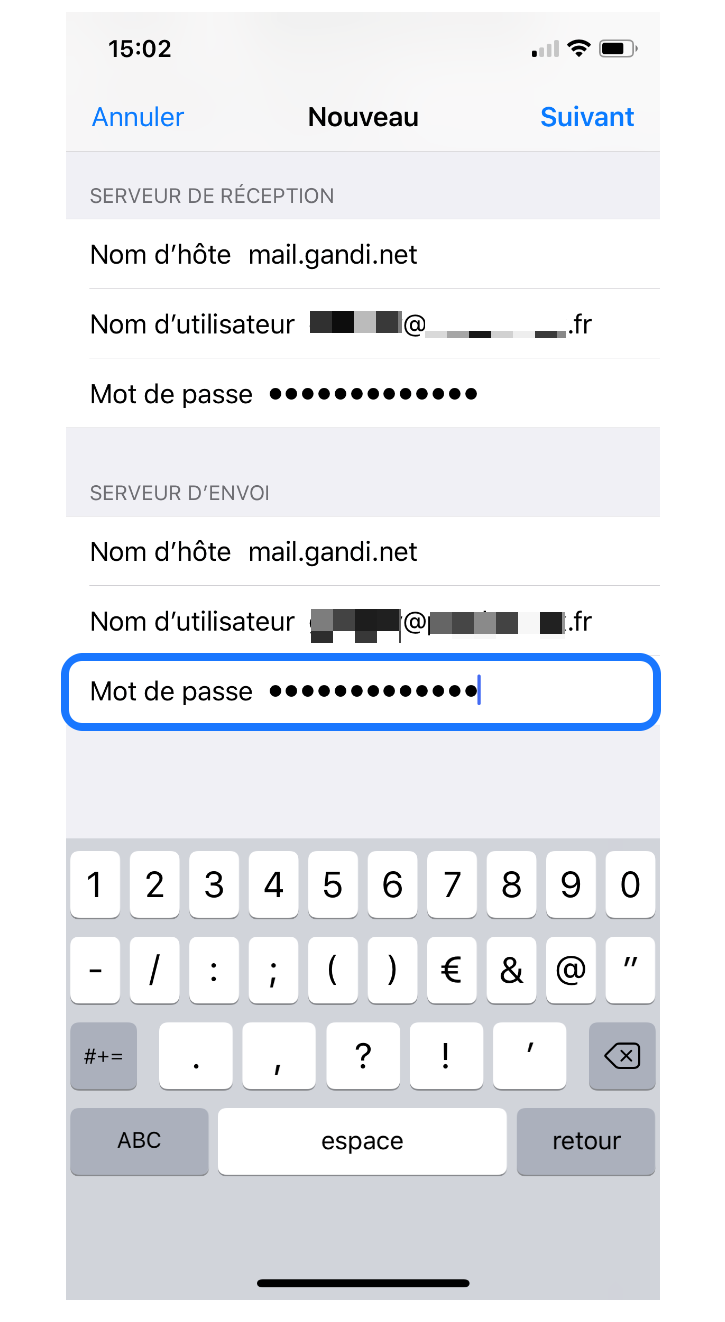
Step 16:
Type your password in the dedicated box
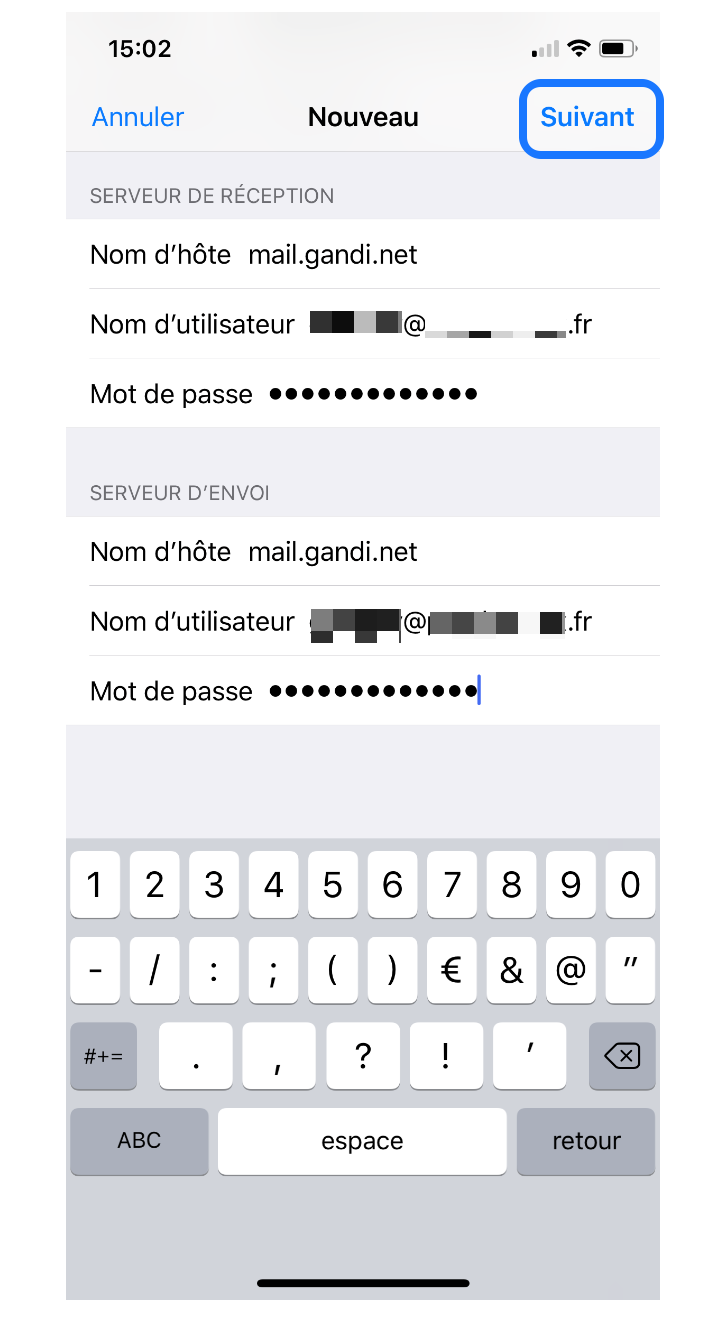
Step 17:
Click Next
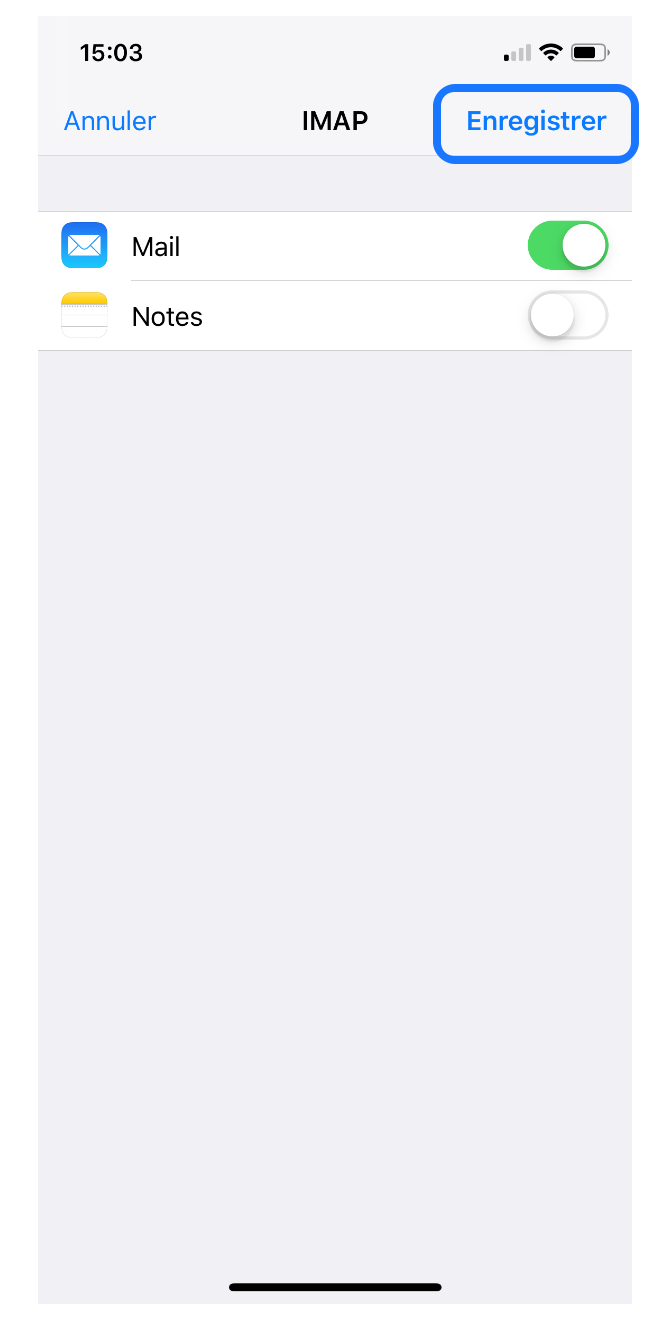
Step 18:
Click Save
Step 19:
Congratulations, your mailbox is configured and operational.
Now you can view and reply to your emails easily directly with your iPhone.